Fall is the perfect time to deck out your porch with a festive motif featuring pumpkins, a potted mum plant, and a bright orange wreath. But, that’s not the only approach. In my Fall wreath tutorials, I show step-by-step instructions to use seasonal harvests to decorate your door from September to November.
Pecan Wreath Tutorial
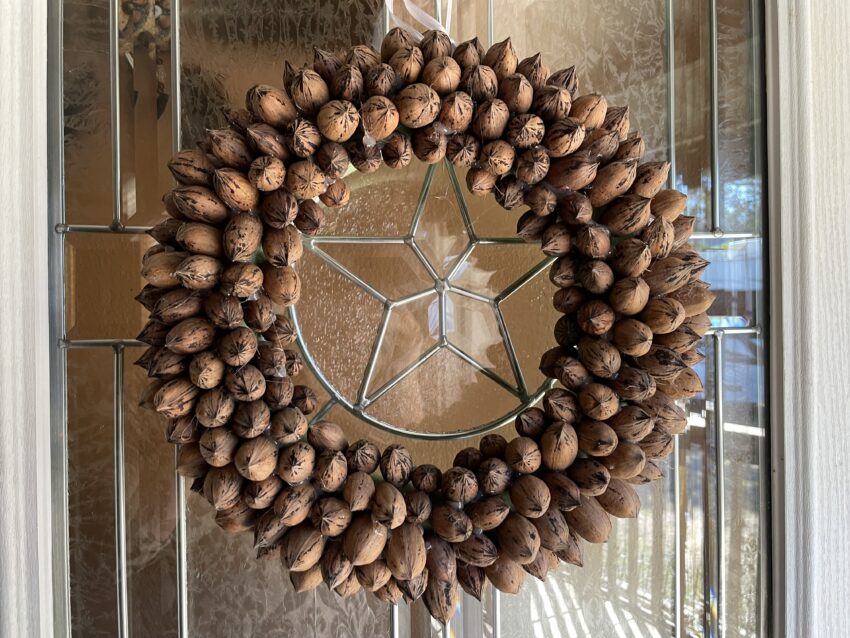
Texas pecans fully ripen during a two-month period between October and December. This fall decoration is the perfect way to use the last of your harvest from the previous year or utilize an abundant bounty available for harvest in your front yard. For this wreath, I used my leftover pecans from last year’s Christmas gifts, shaking each to identify which pecans had rotted from the inside as prime candidates for my wreath. If you live in Texas and don’t have a pecan tree, consider posting on nextdoor or in local Facebook groups to see if anyone has some they are willing to part with. After that, look for a local farm you can support at a farmers market or farm stand.

Materials Required
- 3 lbs of pecans (the older the better to minimize food waste)
- 1 small (~13″ diameter) foam floral wreath
- Hot glue gun and sticks
Instructions
I to start with one pecan glued upright at a “top” (i.e., the outer side of the ring facing away from the viewer) and then glue each pecan in a slanted line towards the middle, one row at a time. After you’ve created one row from the outer “top” to the inner “bottom,” start again on the right side and glue pecans around the wreath in clockwise order. Do this repeatedly. Be sure to give the hot glue time to dry before moving onto the next line of pecans. Usually, you place the pecan in a gap on the line before it; but, occasionally, you’ll need to find smaller or bigger pecans to fill any gaps (usually towards the outer and inner parts of the ring).
Glue tip: Add hot glue at the base and, as needed, against the sides of adjacent pecans. If you do this for all pecans, it’ll run through sticks and you’ll end up with messy strings throughout; so, it’s best to find a balance as you go.

Here I am about a third of the way through. It gets heavy, so be careful if you are lifting it when gluing from the top or bottom. I dropped it between my knees at one point and cracked a shell!

You can subtly see the green foam in gaps in this wreath. To avoid that, wrap the foam with a wide satin ribbon in a neutral color first and secure it firmly with floral pins before starting the process.

Before you glue the last 2-3 rows, wrap a ribbon around the foam wreath to allow easy hanging onto a door hook. Try your best to conceal the ribbon. Finally, remove any remaining glue strings and you’re ready to go! It’s Fall, y’all!